If you have been patiently waiting to get a new iMac, your wait is finally over.
Technology Consultant
I use the Slideshow feature in File Explorer all the time. I have clients send me photos, I save them in a folder, and I just want to see them quickly full screen. Apparently, Windows 11 has done away with the feature. Here is how I fixed it:
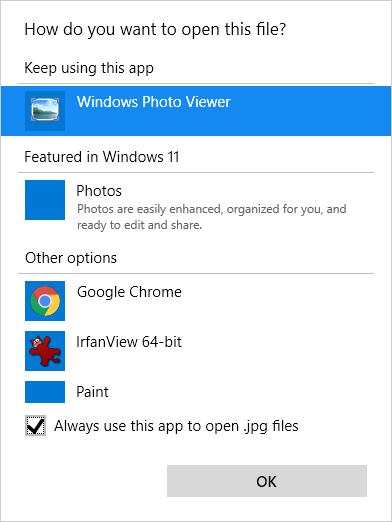
a. Right-click a picture file
b. Open with
c. Choose another app
d. Select “Windows Photo Viewer” (might need to scroll list to find it)
e. Check the box “Always use this app to open…”
f. Click OK
2. From now on, Windows Photo Viewer will open that file type. (You can always change it back to another app, or use Right-click “Open With” to open a single photo in another app.)
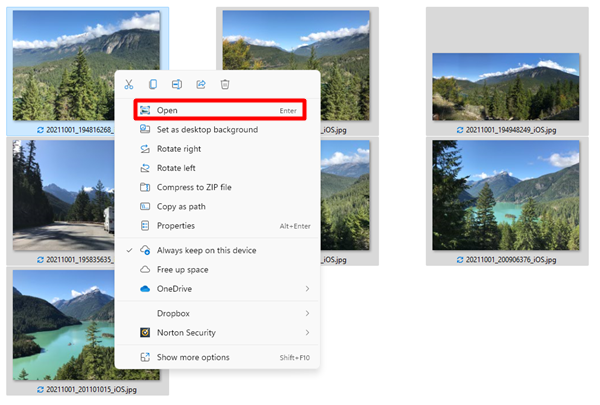
3. Select all the photos you want in the slideshow
4. Right click the first photo you want to start the slideshow with
5. Click “Open”
6. Click “Play Slideshow” button on the toolbar (round center button on toolbar below the photo)
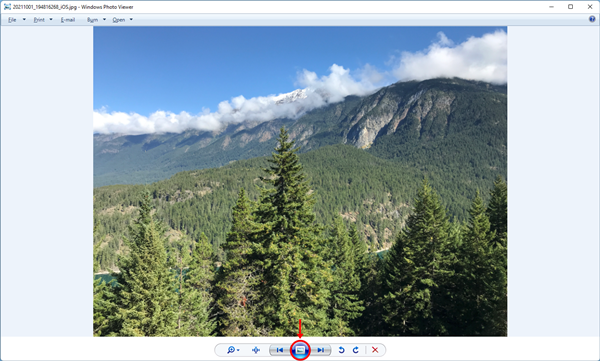
The slideshow will now play full screen.
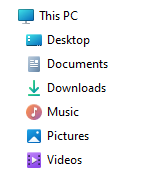
When I setup computers that can handle two drives, I install a smaller, fast SSD as a C “Windows” drive and a larger HDD as a “Data” drive D. Your computer may be setup the same, but what you will want to do is move the folders that contain your “stuff” to D drive and leave C drive for Windows and app/program installs.
Here is how I move Desktop, Documents, Downloads, Music, Pictures and Video folders to D drive:
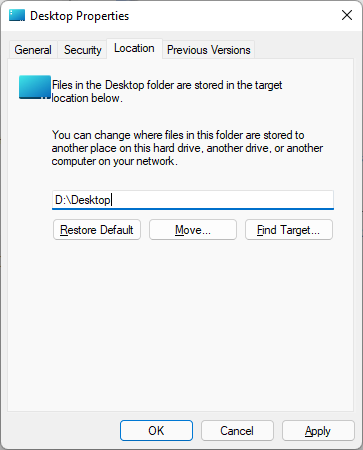
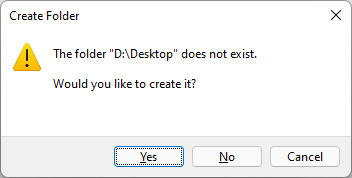
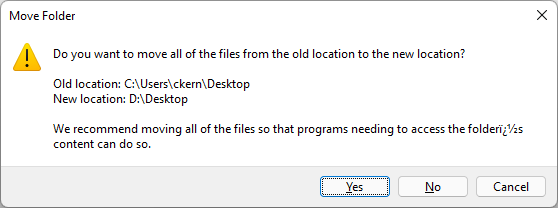
Now all of your files will be on D drive and C will be for Windows and apps.
If multiple people use the same computer and have their own account, repeat these steps in each account. First make user folders on D drive, then the 6 six folders, as sub folders, for each user.
For example: D:\username1\Desktop and D:\username2\Desktop and so on.
If you use cloud drives such as OneDrive, Dropbox, research how to move those folders to D drive also.
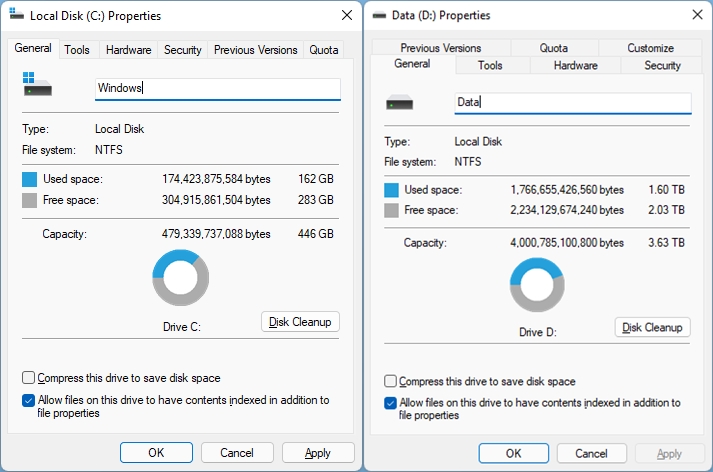
If you want you can rename C: to be “Windows” and D: to be “Data”. In File Explorer, right-click C, click Properties, on the General tab, in the box type “Windows” (without the quotes) and click Apply, then click OK. Do the same for D and type “Data”.
.jpg)
Checklist to make sure you have the protection you need before disaster strikes
.png)
.jpg)
.png)